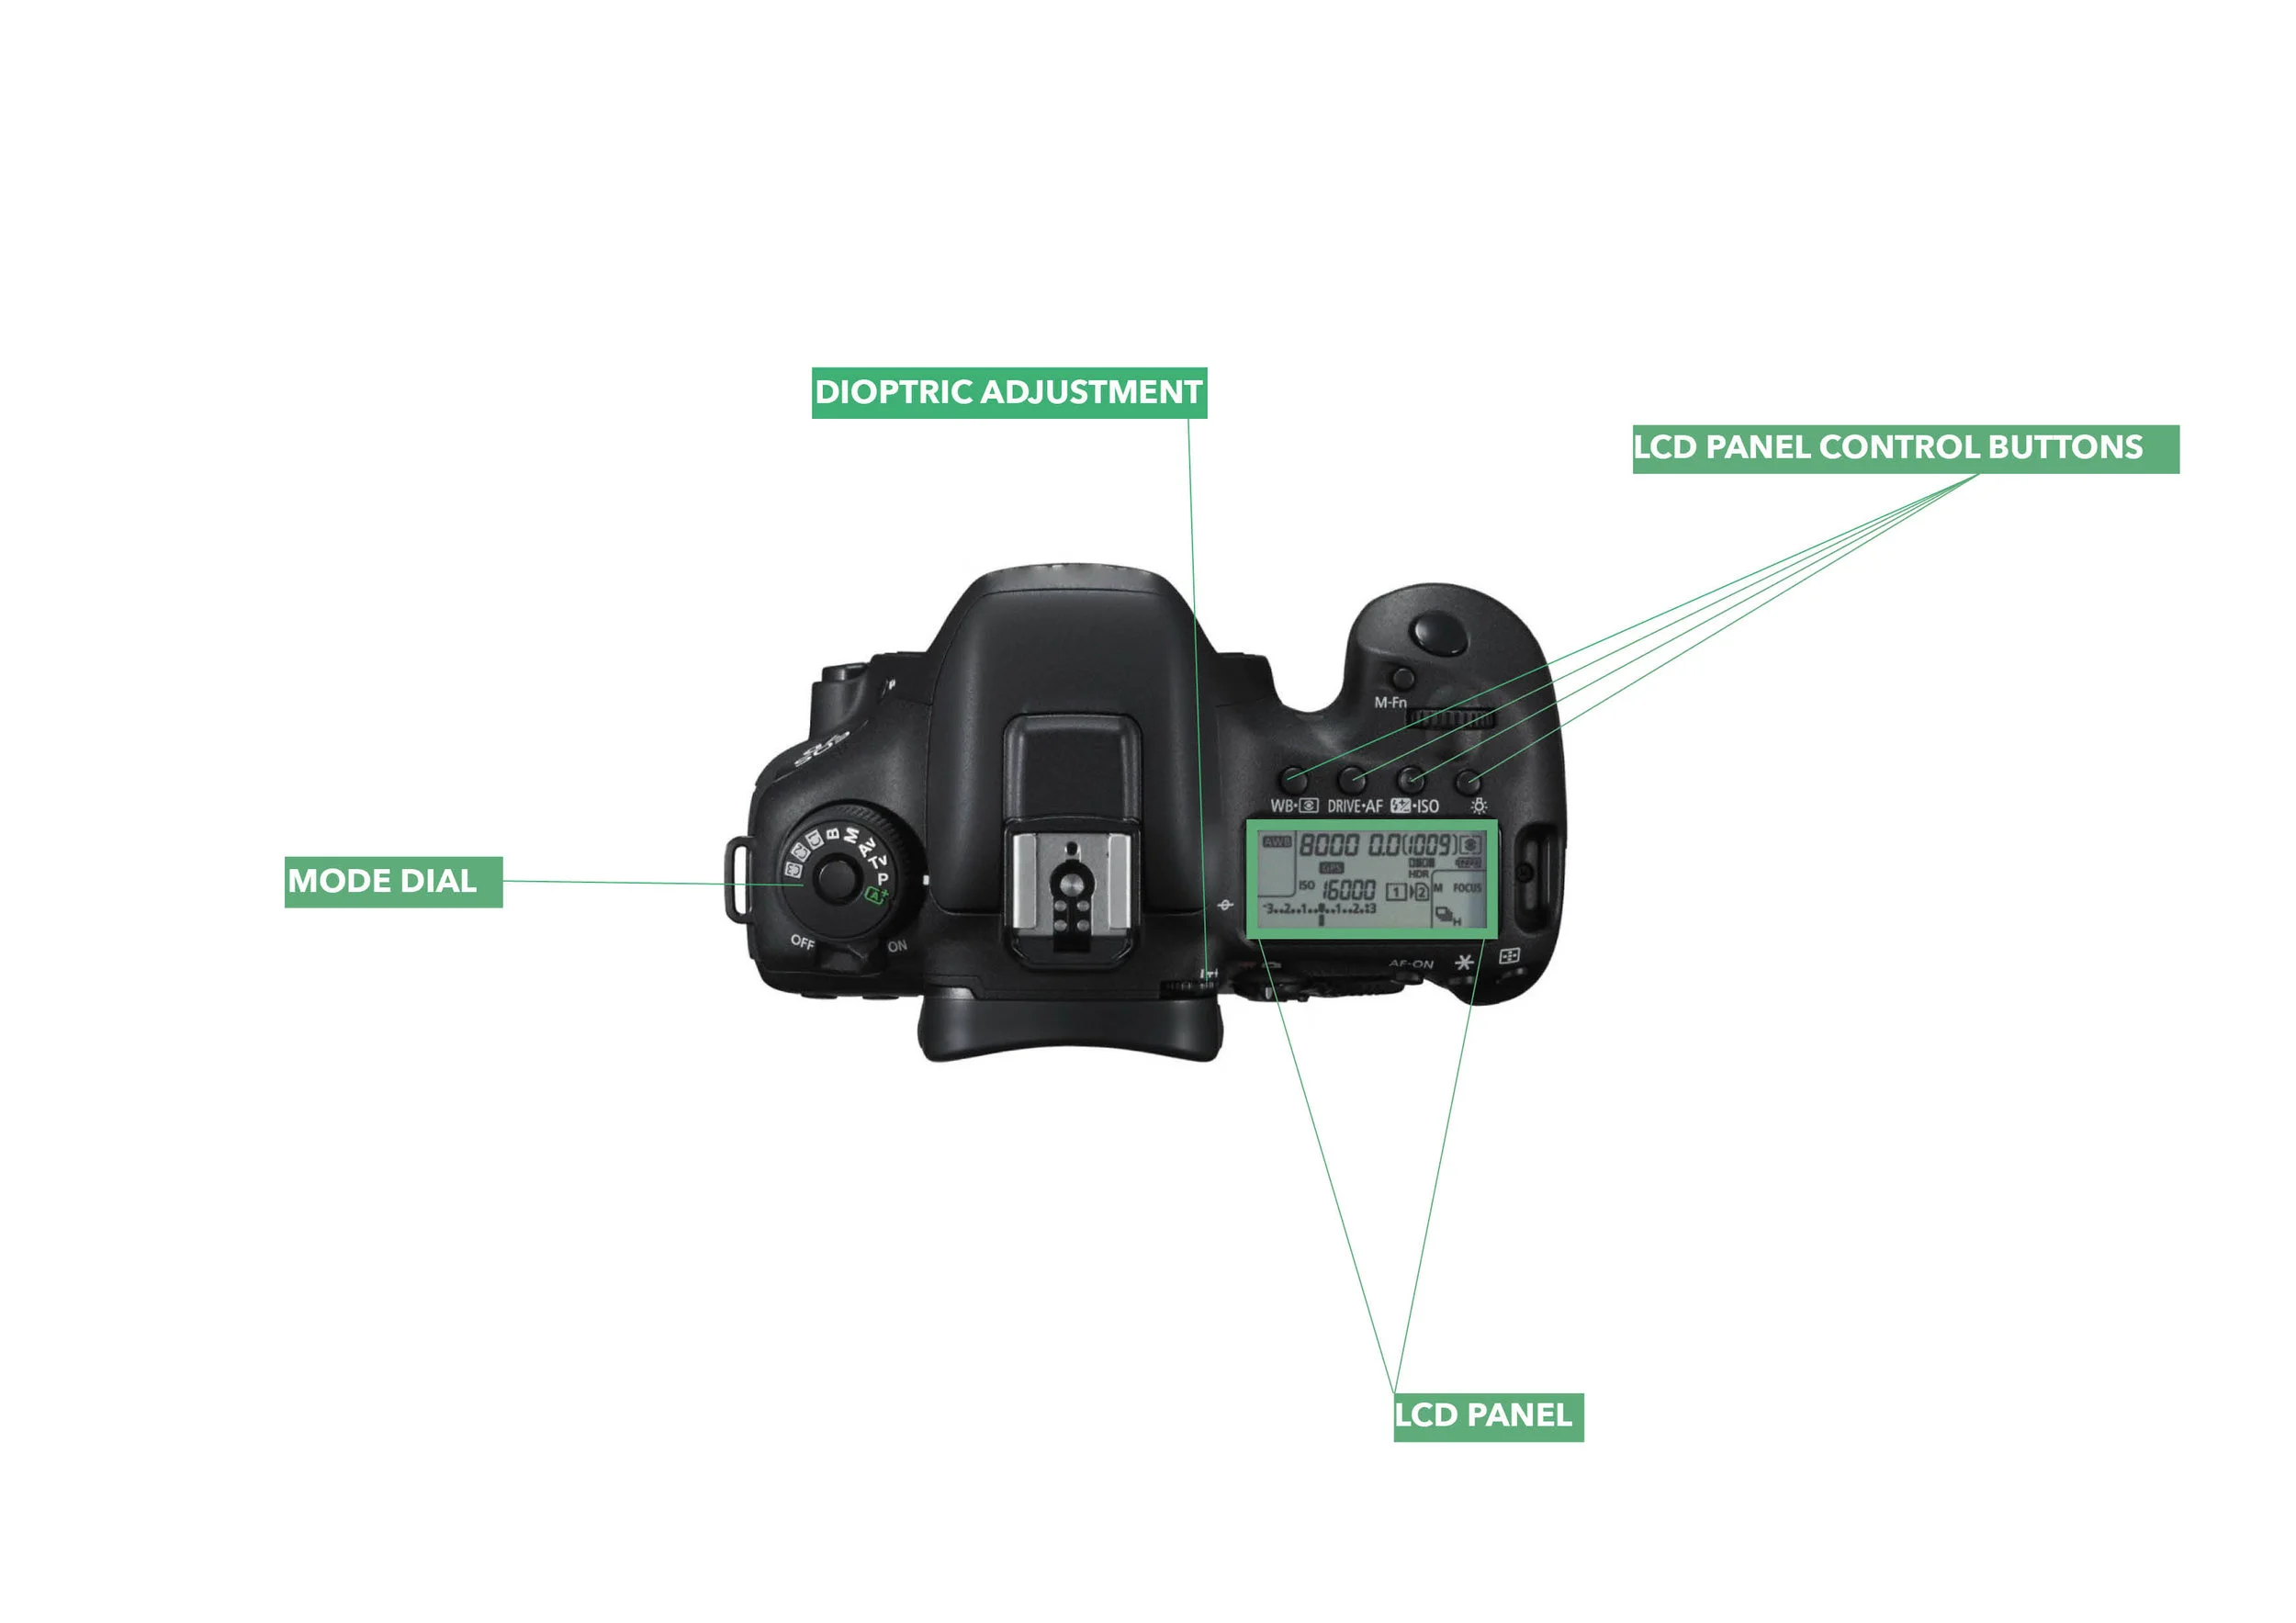
Dioptric Adjustment
Another very helpful feature of your DSLR is the little dioptric wheel. People who normally wear glasses can adjust the wheel to their vision. Another useful tip I got was to remove the rubber eyecup from the viewfinder. It allows you to get closer to the hole and have a better view.
Practice: Look through the viewfinder and adjust the Dioptric Adjustment to see how your focus points go in and out of focus. Set this to a level where focus points are sharp.
Mode Dial
Model dial selects the programming mode for the camera. If you Turn the dial to A+ (AUTO), your camera will automatically choose all the settings for you. However, I’d strongly advise anyone against using this mode as you give away all the responsibility. When shooting in AUTO mode, you are not being creative and run the risk of not getting your desired shot.
All beginner photographers should start using one of the semi-manual or manual modes:
Semi-Automatic Program Mode (“P”)
Shutter Priority Mode (“Tv” on Canon or “S” on Nikon)
Aperture Priority Mode (“Av” on Canon or “A” on Nikon)
Manual Mode (“M”)
Bulb Mode (“B)
The “P” mode and priority modes are autoexposure modes, which means your camera automatically adjust one or more parts of the exposure triangle to achieve the desired exposure. Choose the “M” mode if you want the full control of the camera.
Still feeling confused by what all these modes do? Let’s go into a little more detail since it’s important you know when to use each of the different modes.
Semi-Automatic Program Mode (P)
P stands for program-automatic. Here the camera chooses aperture and shutter speed for you as soon as you press your shutter half way down. Since you can still change the aperture/shutter speed combination by turning the wheel right next to the shutter button, the P-Mode is superior to the fully automatic mode. If you are still using automatic mode, you may want to start with this mode to see how aperture and shutter speed affect your photos.
Shutter Priority (Tv/S)
In this mode, you choose the shutter speed manually. Depending if you want longer exposures times to show motion blur or shorter exposure times to freeze motion, you will choose either slower or faster shutter speeds. Your camera will automatically set the aperture to get the correct amount of light on your sensor (exposure). This mode is great if you are shooting sports or want to introduce motion blur to your photos.
Practice: Turn your mode dial to Shutter Priority mode and select a fast shutter speed like 1/500 second. Take a shot of a moving subject (a child, pet, pedestrians) and attempt to freeze motion. Increase the shutter speed if you have to. Then, try with a slower shutter speed and capture motion blur.
Aperture Priority (Av/A)
Most of you who will start shooting in advanced modes most likely will end up in “Av” in 90% of the time and that’s ok! Here you choose the aperture yourself and the camera adjust the shutter speed to get the desired exposure. BY settings the aperture manually, you are in creative control of things like isolating your subject with a blurry background or an image with overall sharpness. Use this mode if you are shooting landscape (large f-number to get a higher depth of field) or portraits (lower f-number to get a shallow depth of field, thereby a blurry background)
Practice: Turn your mode dial to Aperture Priority mode and select a large aperture (small f-number like f/2.8) and attempt to blur the background in your photos. Then turn the dial up to something like f/11 in an attempt to have your background in focus as well.
Manual Mode (M)
With “M” mode, you operate your camera manually and have the full control. When shooting wedding and events, (most likely with a flash) it’s inevitable to use manual mode, as light conditions change constantly. Even if you have time, like in landscape photography, manual mode is the fastest and safest way to go. Adjust your settings until you get the exposure right. And always check your screen and histogram to judge if you got it right!
Tip: Being forced to be aware of your settings and exposure makes you learn rapidly. Plus, you become more creative by having the full control.
Practice: Turn your mode dial to manual mode and start with f/2.8, 1/500sec, and ISO 100. Is your photo overexposed? Try to correct the exposure by adjusting either shutter speed or the aperture. Don’t be afraid to take 20 shots if you have to, it’s free!
Bulb-mode (B)
B stands for Bulb-mode. In this mode, your camera will expose the sensor as long as you hold down the shutter. Why is this useful? As most DSLRs only offer shutter speeds up to 30″ seconds you will use the bulb mode in case you want to expose longer than that. When using Bulb mode, your camera should be mounted on a tripod and you must fire the shutter with a remote control to avoid camera shake.
Use this mode to get a ghost effect (make moving objects invisible) on busy landscapes or smooth out water, clouds…etc.
Practice: Turn your mode dial to Bulb mode and mount your camera on a tripod. Aim to create motion blur (traffic, pedestrians, spinning objects, flowing water) by pressing your shutter speed as long as you want. You will be amazed by the results!
Custom Modes
In Cannon DSRL there are custom mode selectors (C1, C2, and C3) that you can pre-adjust and save all your settings. For Nikon users, in your settings menu, look for a setting named “Shooting Menu Banks” where you can store all your settings under a custom shooting mode name.
Custom modes can be extremely helpful if you are often changing to the same settings. For example, if you do a lot of studio work where you frequently use the exact same lighting setup, you may find them useful. Another example is if you are shooting wildlife. Here, having all your settings in one custom mode allows you to quickly load them all at once and start shooting.
Use The LCD Panel To Set Up Your Camera
Last but not least, I want to give you a brief overview of the LCD panel (usually located on the top). Here you have all the important settings at sight. Illuminate the panel by pushing the light bulb button on the top right.